Wednesday, November 27, 2013

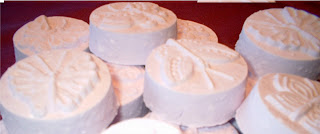
Goat Milk & Honey Soap with Oatmeal

 
I used 2lbs total of soap to make these soaps in the Milky Way Bee with Honeycomb molds. I got nine soaps, so I filled all 4 cavities of 2 trays and 1 cavity of a third tray. You can use any molds or even a 12 inch drawer organizer, which holds 2lbs exactly.
Melt 1.5 lbs of Goat Milk melt & pour. In a separate container melt .5 lbs of Honey melt & pour. You want both soaps melted at the same time. Fragrance the melted Goat Milk soap. I used 1 tsp each of Lavender and Litsea Cubeba essential oils, I'm intending this to be a Gardeners Bar. Stir a handful of oatmeal into the Goat Milk soap after you fragrance it.
Now start to fill your molds with the Goat Milk soap stirring gently as you pour, you want to get some of the oatmeal into each soap, you may even have to spoon a bit of it in. Leave a little space at the top of each mold for the honey soap. Quickly top off each bar with the melted Honey soap. It will sink to the bottom of the mold and carry some of the oatmeal with it. These soaps will all be a little different when you unmold them, or mine were anyway, but they all look really neat. Thanks for looking!

Tuesday, November 19, 2013

Acorn Tray and Layering

I dug out another of my really old soap trays, this one only had one little crack and I was very careful not to make it worse. I wanted kind of a burgundy coloured soap so I mixed a little red liquid colour in to some purple glycerin soap. With the tray I did my usual self layering using mostly goat milk soap and then with the trees pictured below I did the defined layering. You can see the coloured soap looks darker with the defined layering.

 For the Santa and Star soap I mixed the leftover coloured  and goat milk soaps together for a dusty rose colour. Thanks for looking!

Thursday, November 7, 2013

Pinecone Tray

I've had this Milky Way tray mold for years and it has seen better days for sure. I used it to make the soap pictured above, it did have some cracks around the rim but as long as it wasn't  overfilled all was well -until I went to take the soap out of the mold and cracked it all the way down a corner.

So then I put a lot of tape on that corner and used it to make this soap. You can see I also used a little more cappuccino mica in this soap, its more what I was going for. I may have to retape the mold every time I use it but I don't mind. Thank for stopping by!

Thursday, October 31, 2013

Candles with Steven & Chris Part 2

After checking out the candles that Steven & Chris made (see post below), I wanted to give it a try. I didn't have any thrift store teacups so I settled for candle containers from the dollar store. At least I know they are heat proof. I was lucky enough to already have some votive wicks but I'm sure any hobby store would sell them. You need the ones with the little tabs on the bottom to make this easy. In the pictures above and below you can see I have attached the little tabs to the bottom of the containers with a little melted wax.

I used pens to centre the wicks, very scientific I know, and a combination of Oatmeal Cookie Beanpod Soy Wax beads and some of our Soy Wax Flakes that I fragranced with Cinnamon.

 The small containers have the Oatmeal Cookie beads that I melted in the microwave and the larger container below has a layer of the Oatmeal Cookie beads and a layer of the soy wax flakes. Let the first layer get a nice hard top before pouring on the next layer. You also need to save a little wax  to  melt and top up the containers. The first pour usually sinks a little and ends up uneven after it cools. A  top up with a little more wax will harden nice and smooth. I had to do that with the small containers but not the large one so I guess I doesn't happen all the time. Let me know if you have any questions, thanks for stopping  by!

Wednesday, October 16, 2013

Tea Cup Candles on Steven & Chris

I was so excited when I caught a bit of Steven & Chris today when they were doing a segment on re purposing china. They were using the Soy Wax beads that I have at the store to make candles. Here's a link to the segment, love that show.


Thursday, October 10, 2013

Pumpkins & Turkeys

 
Not the best picture but the Milky Way Thanksgiving mold makes some really cute Thanksgiving/Halloween soaps. These are done with some Goat Milk Melt & pour with a little Honey Melt & Pour added to tone down the white. This 4 cavity mold is on sale for $5.00 until October 31.

Friday, October 4, 2013

Chestnut & Clove

 
Here's a 2lb batch of soap made with the Chestnut & Clove fragrance using the recipe I used here.
The colour swirled on the top is a combination of some powdered clove and bronze mica, mixed in with about 3/4 of a cup of soap. I could have gone a little darker, next time I will try cappuccino mica. Anyway, the fragrance behaved nicely and seems to be holding up. Thanks for looking!

Edit: I've added a couple of photos below, one of this soap cut and one of another batch of this soap with a different swirl on top using Cappuccino Mica (the original soap was done with Bronze Mica).


Thursday, September 26, 2013

Soy Wax Melts - No Cheating This Time

 I've gotten some soy wax flakes in the store so I've made some wax melts without using the pre scented beads- see this post. I've just tried a few small batches, so for 5 melts using the
Milky Way Tart Molds I melted  70 grams of wax. The recommended amount of scent to add is 10%, I may have went a little over. Its hard to weigh out 7 grams of scent and I do tend to get carried away in the scent department. The pumpkins are fragranced with Pumpkin Crunch Cake.

My sister donated some orange wax from the remnants of a soy candle. I included that in my weight. To melt I did 45 seconds in the microwave twice with a little rest in between, you don't want the container to get too hot, or the wax.


I had a silicone ice cube tray that I tried. These ones I did with a Pear and Apple Jack blend. Of the five melts I made, only two came out without the leaf breaking off. I'd say silicone works OK but be careful of the shape.


 The pumpkins have a little bloom on them which I'm pretty sure is from the excess fragrance
The soy wax is 2lbs for $7.99 and will make 65 to 70 wax tarts depending on the size. These would make great homemade Christmas Gifts. Thanks for stopping by!

Wednesday, September 25, 2013

Coconut Lime Verbena Soap

Last weekend I tried out a new to me (and to the store) fragrance in a batch of soap to see how it would behave. I am  happy to say there was no accelerated trace, seizing or ricing. I used a full seven teaspoons in a batch that was a about four pounds and could really notice the fragrance when I was cutting this last night. I fill two 3lb loaf molds a little over 1/2 way each. Since I didn't fill the molds to the top, I've cut the bars a little thicker. As you can see, most of the soap was coloured with a green oxide, I did remove "some" to colour with some yellow lake- that was after I had fragranced the whole batch. I stirred some poppy seeds into the yellow soap and sprinkled some on top. The recipe below is my usual from The Soapmaker's Companion. If you're trying a new scent, its good to use an old recipe :) BTW as per the title of this post, the scent I used was Coconut Lime Verbena.

Soap Essentials Bar II from The Soapmaker's Companion

201g sodium hydroxide
538g distilled water
595g olive oil
454g coconut  oil
396g palm oil (I only use sustainable palm)

Temps between 80 to 100F.

I have a few more new fragrances to try, the next one I'm planning to use is Chestnuts & Clove, so I'm thinking white with a little powdered clove in a swirl? Thanks for stopping by.


Thursday, September 19, 2013

Chocolate Chip Cookie

 My latest order of fragrances included a sample of Chocolate Chip Cookie & I had been wanting to make a soap with a little bronze mica, so I thought the two would be a perfect pairing. The new fragrances (limited edition) are Chestnuts & Clove, Coconut Lime Verbena, Eggnog and Rice Flower & Shea, they are listed here on the site. My next order will include some Chocolate Chip Cooke for sure! To see how I made this soap click here.
 

Sunday, September 1, 2013

Ornaments Bath Bombs

 
I used this recipe with out any colour to make some bath bombs in the Milky Way Ornaments mold. I brushed a little mica on after they had dried. I think they will be cute in gift baskets for Christmas, I just need to find the right size of cellophane bag for them. Has anyone else started thinking about what they're making for the Holidays?

Wednesday, August 21, 2013

Soy Wax Tart Melts & New Molds


We have some Milky Way Wax Tart molds at the store and on the web site so I decided to try a few of them out. I didn't have any suitable wax on hand so I melted some of our Beanpod Wax Beads.
 I used McIntosh Apple, Cinnamon Bun and Pumpkin Pie. The molds have eight cavities and one tube of the wax beads will fill five. The amount of beads seems to vary a little so I just divided the melted wax evenly to make five tarts. In my microwave two bursts of 45 seconds was enough to melt almost all of the beads and a few little swishes of the measuring cup I had them in finished the melting process. They harden in about an hour.

Aren't they cute? You could also make small bath bombs or bath melts in these molds.

The picture of the jars below isn't great but these little glass jars from Superstore each hold five wax tarts perfectly.

Here is a picture of the mold I did not try. I think this butterfly would be cute with a fruity scent like Lemon, Lime or Orange-Vanilla, yum!  Thanks for looking!

Thursday, August 1, 2013

Blue & Green Dolphins - Playing with Colour

Here's a variation on an old post from 2010 using multiple pours of coloured soap. You need as many hands as you have colours because they are poured at the same time. For the variation, I filled my molds part way with some Goats Milk melt and pour and then added the colours, which in this case was only two. The shape of the mold helped the colours to stay separate, I really like the way these Dolphin soaps turned out.

 You can see in the background that I have a tray mold in a cookie sheet of cold water, that's for the leftover soap. I melted a full 2lbs of Goat Milk soap and a 1/4lb of each colour.
Here are some Dolphins having their close up.

 I poured the left over Goat Milk soap in to the tray mold and then the coloured soaps, one colour at each end.
These flowers are a bit of a fail. I had my sister help me and we did purple, pink and yellow soaps. Although the soap turned out pretty,  I was hoping for something more like the leaves we did in  this post. Thanks for looking, any questions let me know in the comments.

Thursday, July 25, 2013

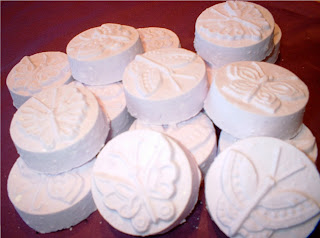
Honey Soap & Butterflies

The latest soap shipment also includes some  Glycerin with Honey melt & pour that's a little darker than what we got last time. I told the manufacturer that we're used to having the honey soap a nice amber colour so they used a different kind of honey, now it looks more the colour that I'm used to. The three bars at the top of the photo are made with the paler honey soap, which is still nice.
Here's a closer look, the butterflies show up nicely with both kinds. I actually like the mix.
Thanks for looking!

Thursday, July 11, 2013

Butterfly Guest Mold Bath Bombs

Another mold I've been meaning to try is the new Milky Way Butterflies Guest Mold. I made a single batch scented with Lavender essential oil and coloured with a bit of purple powdered colourant. I had a hard time capturing the detail in the photos but in real life the butterflies show up great.
This link to a post a month or so ago will give you the basic recipe. Thanks for looking!

Pink Puppy Paws

Why oh why did I wait so long to try the new Milky Way Puppy Paw mold? The little paws are filled with some Goats Milk melt & pour soap that's been tinted a very light pink. The background is from our new shipment of coloured glycerin melt & pour, I added one little square of goat milk soap to the pink glycerin when I was melting it. It made the pink soap a little less clear, I like it that way sometimes. The little paws were easy to  fill and the soap was already starting to harden in the mold by the time I'd done them all. I did a little cleanup with a toothpick and then gave them a good spray with rubbing alcohol before adding the pink soap. I was really glad that I had the pink soap already melted and fragranced. This soap is scented with Strawberry fragrance. Thanks for looking!

Tuesday, July 9, 2013

Pre Coloured Melt & Pour Soap Back in Stock

It was slim pickin's in our selection of pre coloured melt & pour soap lately. We were down to yellow and lime green, but that has changed as of this morning. We are restocked in emerald green, red, pink, purple and are now carrying blue as well. We were unable to get that one last time. All coloured melt & pour soap has been priced at 10% off until August 31.

Saturday, June 29, 2013

Red & White Soap

Since its Canada Day in two days, I tried my hand at a red and white soap in a  loaf style with candles. I used a 6 inch drawer organizer which holds about 1 pound of soap. I rolled some thin soap to make the candles- I know they're no prize:) and used hemp twine for the wicks.
The top layer of soap was an afterthought, I was wishing I had made the candles white and then decided to add a thin layer of white soap so the candles would show up better. I've sprinkled some red cosmetic glitter on the top. If you use glitter on or in your soap make sure its cosmetic grade, I bought mine at a make up counter so I know its skin safe. You can see below that the candles are too close in colour to what was going to be  the top layer.
 
If you look at the cut pieces below  it looks like I used pretty much equal amounts of both colours but there's also some clear in there too. So 1/2 lb of white goats milk melt & pour and1/4 lb each of clear soap and some precoloured red soap is what I used. I melted some white and red soap in separate containers and poured the white first and then the red, letting the red sink to the bottom and the white rise to the top. Then once the white soap had a nice thick skin on it, I sprayed some rubbing alcohol on to it and poured a layer of clear soap and gently placed some red soap curls into the clear soap. Then I added the candles, I had to hold them all in place with pens and pencils. Once the clear soap had hardened enough to hold the candles in place, I sprayed that with the alcohol and did the last layer of white soap. I  added a little fragrance to each layer, sometimes its hard to remember to do.
Thanks for looking and have a happy Canada Day!
Friday, June 7, 2013

Pineapple Soap

For this soap I used 2lbs  of yellow glycerin melt & pour soap and a couple of squares of goats milk melt & pour. Once melted I stirred in 1/4 tsp of white mica and 2 tsp of Pineapple fragrance. I filled the Milky Way Paisley tray mold and a couple of smaller individual molds.
I like to add a small amount of goats milk melt & pour to the coloured glycerin soap to make it slightly opaque. The mica adds a little shimmer. Pineapple fragrance is 10% 0ff this month.     Thanks for looking!